 |
| A little eye-candy... |
You guessed it! Exhausted again, but I haven't worked on studio gear for TWO WHOLE DAYS! It feels like an eternity. On Tuesday, I was catching up with a friend at the studio and we ended up killing most of the night chatting and playing with a rhodes going into a space echo and listening back on a vintage 4x10 traynor cab/head (which was totally awesome). Tonight, I had some things to take care of at home and I tried to rest a bit as I think I'm coming down with this cold that everyone else seems to have. Lucky for you, I've got months of pictures/work to show you still!
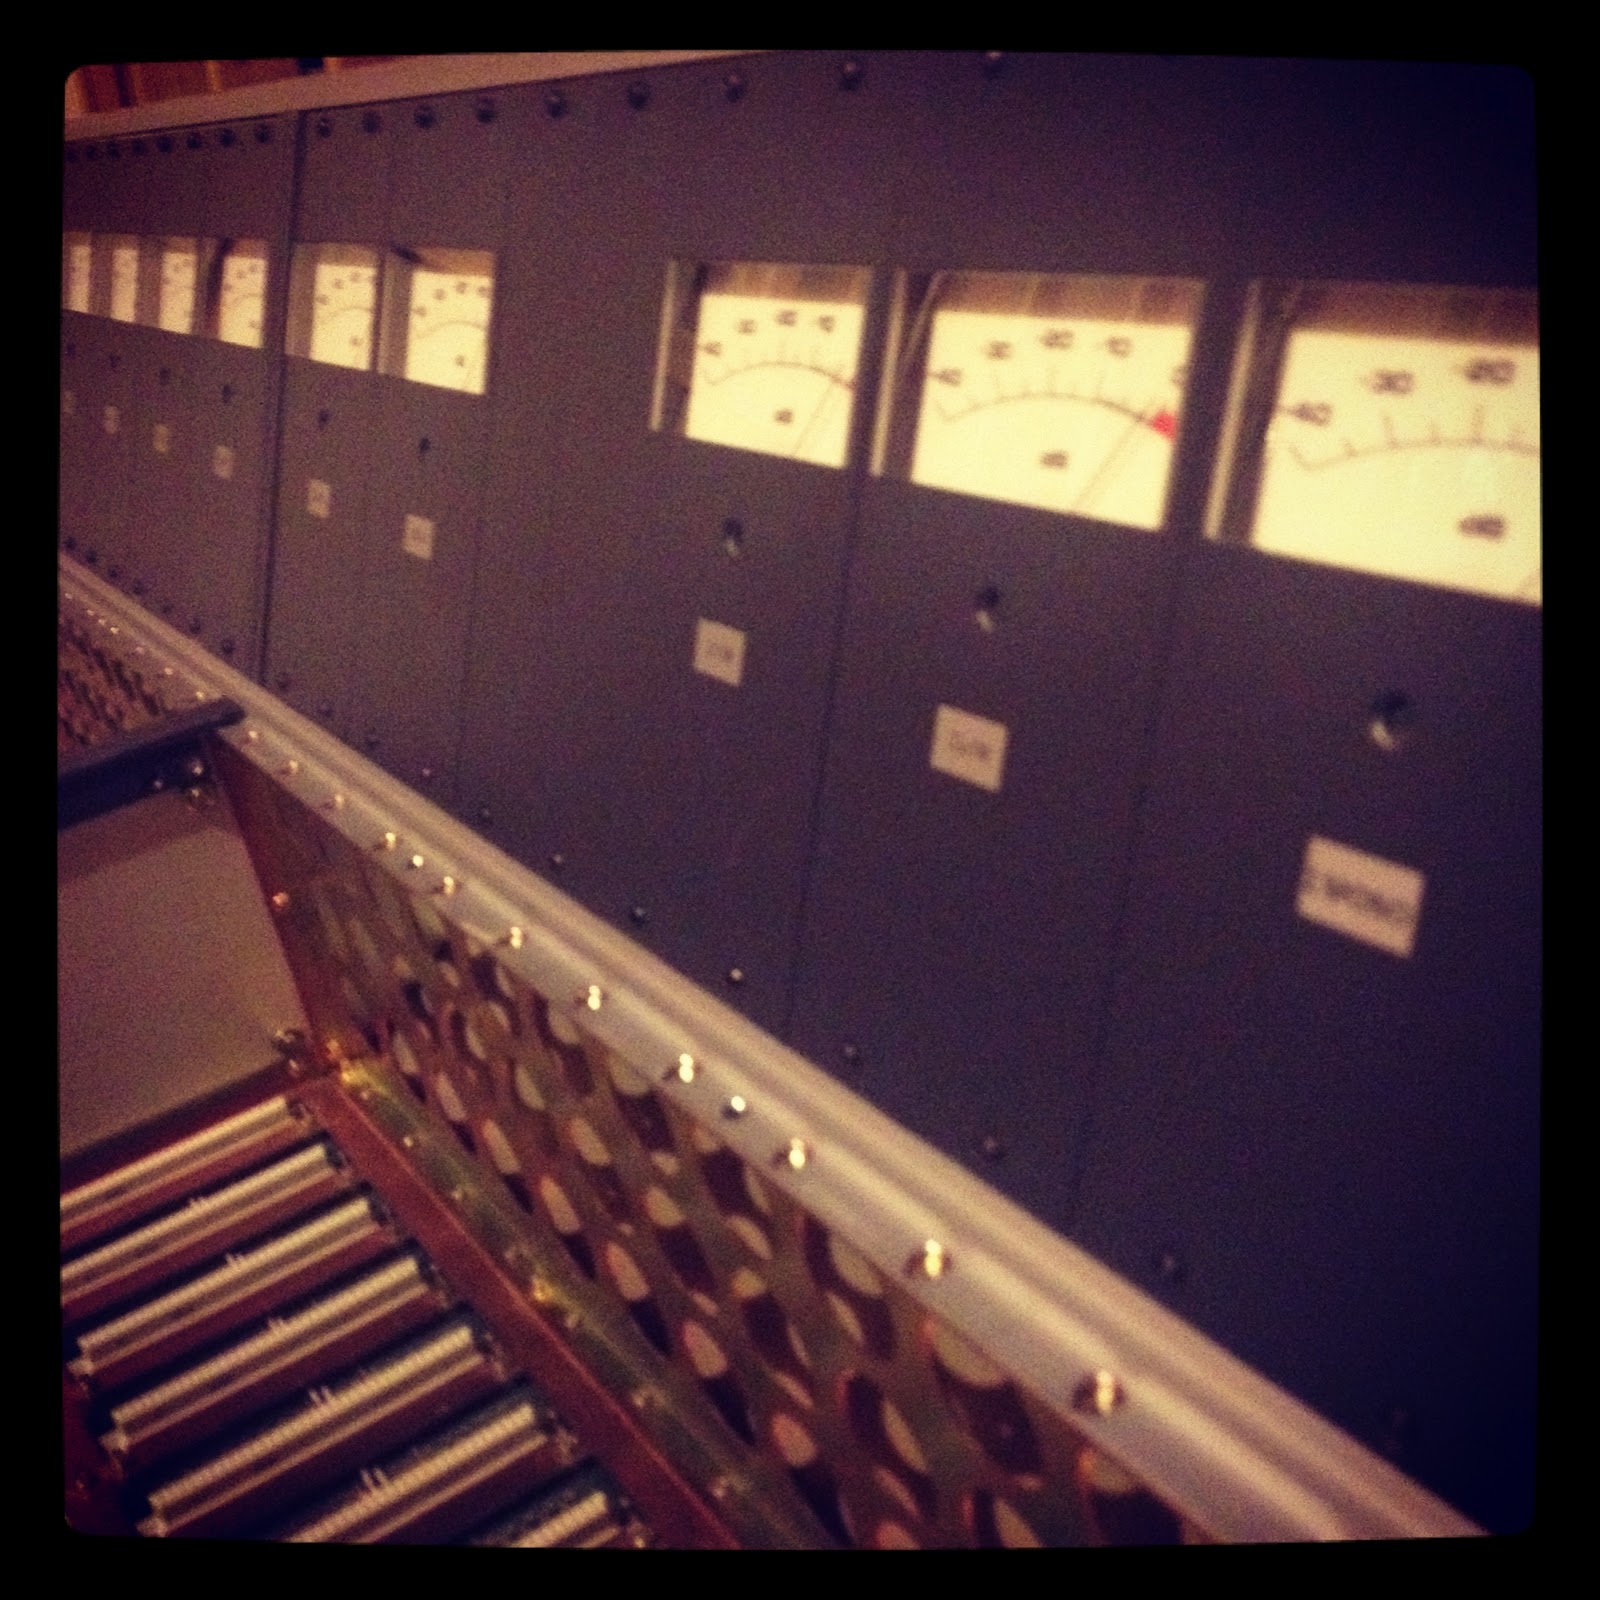
I'm feeling pretty basic, so let's just cover the VU's today.
My Studer 903A has 11 large VU Meters and 4 small VU Meters. The large VU's are broken down as follows:
Group 1-8 (x8)
∑1+2 (x2)
∑Mono (x1)
The Small VU's are all in one module and represent the 4 sends.
The Large VU Meters
 |
Not a lot to say with these... they are large VU Meters. What do you want from me? Am I here to entertain you?
I am? Oh... well then here are some more pictures. |
 |
| Only 4 Caps to change here (the 4 blue cans). |
 |
| The blue connector connects to a ribbon cable in the meter bridge. |
 |
| The grey wires extend up to the lamps to light up the meter. |
 |
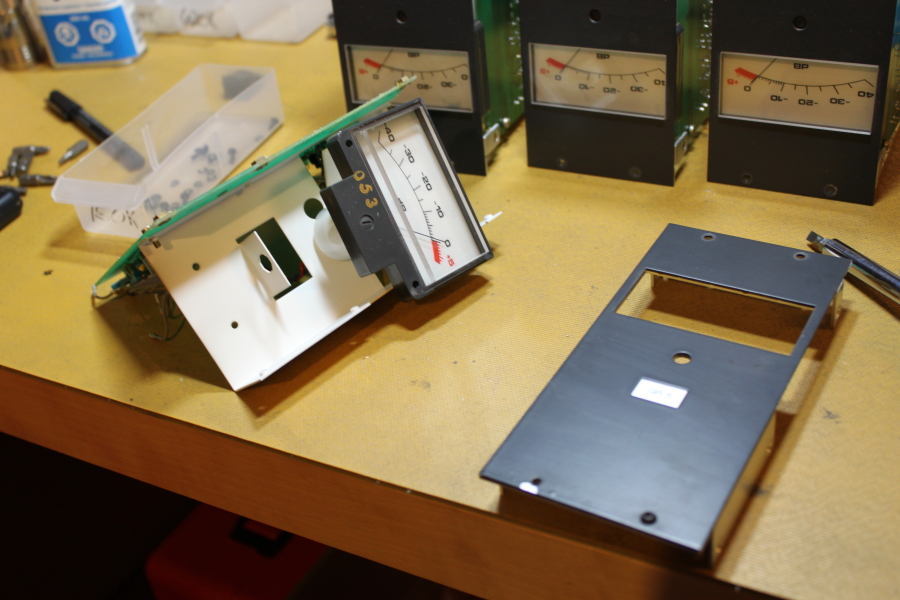
| Undo a couple of screws and presto! Off comes the front plate. |
 |
| I restored the modules in groups. Here are the first five pcbs with the capacitors removed. |
 |
| Compared to the console channels, the soldering/desoldering on these was like being on vacation. |
 |
| Not looking too shabby! Just needed a bit of isopropyl alcohol to clean up some old flux. |
 |
| New capacitors in! |
 |
| Here are the other five that I worked on in this batch. Module faceplates, VU meters and pcbs are clean! |
 |
| All done! The modules were a decent bit of work, but nothing overly complicated. |
 |
| What a beauty! |
 |
| All of them are finished! I used the meterbridge as a nice place to sit them as they were completed one-by-one. |
The Small VU Meters
 |
| Not many capacitors on these, eh? Just those two! Easy-peasy! |
 |
| But that doesn't mean that I can slack off! Module apart, before cleaning. |
 |
| Back together again. VU's, faceplate, and pcb cleaned. Notice that extensive recap job there as well! |
 |
| Done! These modules are really quite handsome. |
Not too difficult of a post today. A couple of other meterbridge modules to cover next week. Oh, and remember how I mentioned last week that you would see the entire meterbridge and console body today? I lied. I realized that I can't show you the whole thing without covering some extra modules first! Don't worry. We're flying through this console. I think we only have a couple more weeks until we're done!
Have a great weekend!


No comments:
Post a Comment