Whew... I feel like my posts for the next few weeks are all going to start like this. I am exhausted! I have decided that I want the new studio up and running by December instead of January, so I have been spending a tonne of time working. With that said, I refuse to cop out and post half-hearted blogs. Luckily, I think that the next few posts are going to be a bit easier than the Studer 903A Eurocard series (those took an inordinate amount of time to do).
Like I mentioned in my last post/video, I am going to come back to the EMT140 when the parts I am waiting for have arrived. I've been jumping around a lot between the console, moving, and the plate reverb. Although I like the variety, it doesn't really speak to the art of continuity. Let's power through this console, shall we?
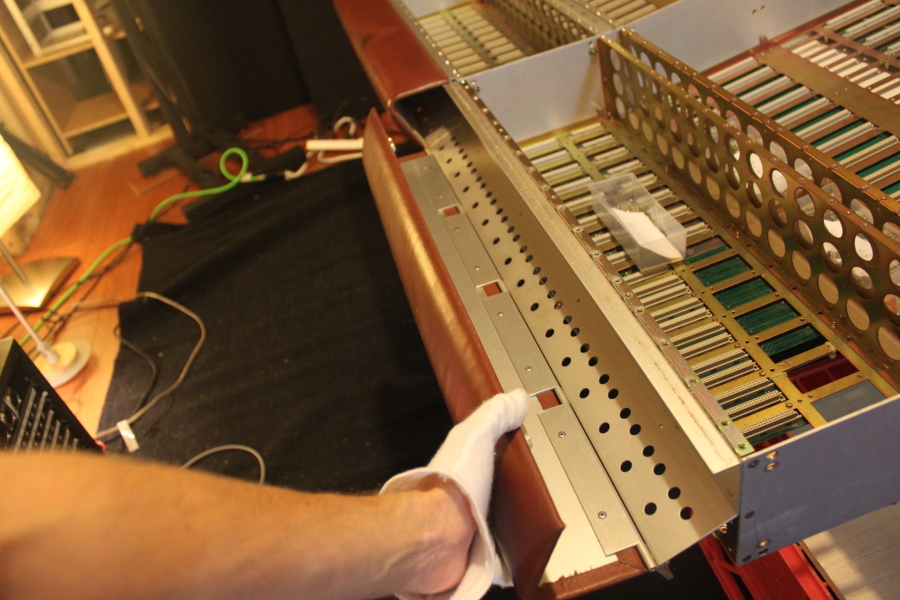
Finally, you get a good look at the actual body of the console. A beaut, isn't she?
As you can see in the picture, I had already removed all of the modules.
After going through the folder of pictures, I think that there are going to be a lot of images in this post. I was right; this should be an easy one!
 |
| First thing's first. The under-belly plates are removed. This exposed a lot of backplane circuit boards and wiring that are used by the channelstrips and faders. |
 |
| There they are! A little dusty... |
 |
| Started cleaning out the back of the console where the inputs and outputs are. There are wire conduits but they have no covers. It was really a mess back there. |
 |
| I would like to remind you all that this was the THIRD time I had cleaned the frame (albeit, this time I was much more thorough). |
 |
| The milk-crates and boards are in position... time to take the legs off. |
 |
| As I have moved the console quite a few times now, I am very familiar with the console looking like this. |
 |
| She already looks pretty naked... |
 |
| The legs and leg supports. |
 |
| Taking off the rails on top of the meter bridge. This held down the grey cover on the top of the console. |
 |
| Undo a few screws and you get a surprise! It seems that, in some of these consoles, they would put the patchbay under the fold-down arm-rest! Mine was obviously not set up for that, but it's pretty neat to see. |
 |
| Dirt, dirt... everywhere. |
 |
| I assume this is from the factory when it was ordered. |
 |
| Off come the little grey panels in between the wooden legs and wooden covers for the side of the meterbridge. |
 |
| More rails to remove. |
 |
| If I stripped it any further, I'm not sure if it would ever get back together, haha. Seriously though, this allowed me to get into all of the nooks and crannies to get it nice and clean! |
 |
When you are taking a lot of screws out of a piece of equipment, it is very important to:
A) Take a lot of pictures
B) Label screws with names that you will recognize.
This is especially true if there is going to be a break between disassembly and reassembly. |
 |
| Most of the hardware that I took off of the console. It's mostly channel strip rails, scribble strips, and filler boarders around the buckets. |
 |
| They could really do with a good cleaning. |
 |
| I actually filled a bathtub to clean these. I really wanted to make sure that they were spotless! |
 |
| I had removed the guides for the eurocards so that I could clean under/around them. It was definitely worth it (so much dirt and dust under there...), but I had to take extra care to make sure that the guides were replaced in the correct spot. If I made a mistake, a eurocard was not going to fit back in when I was finished! |
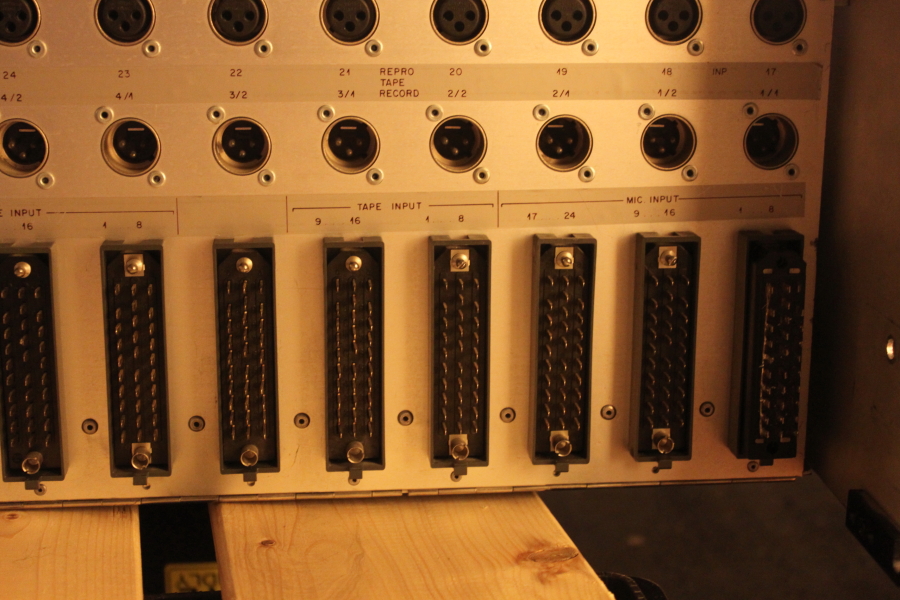
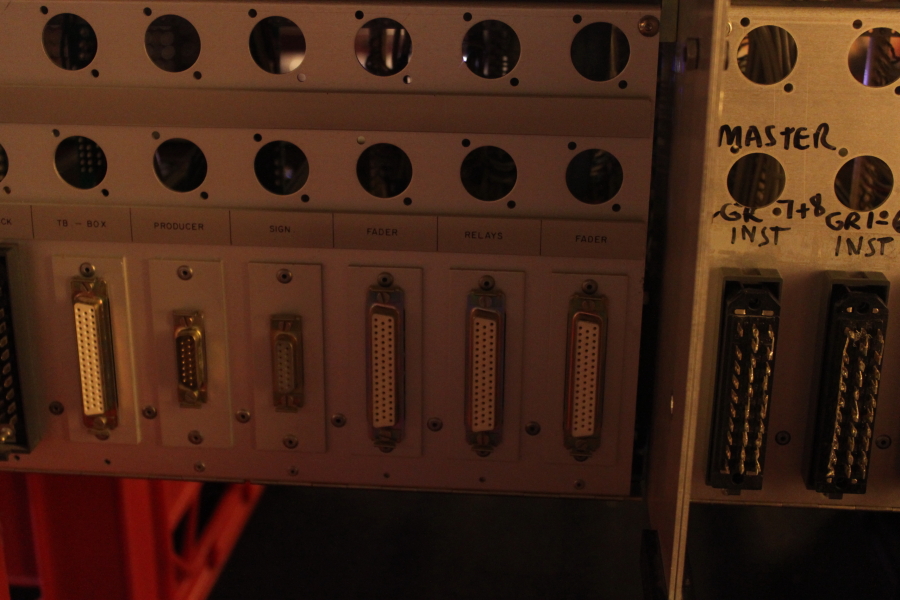
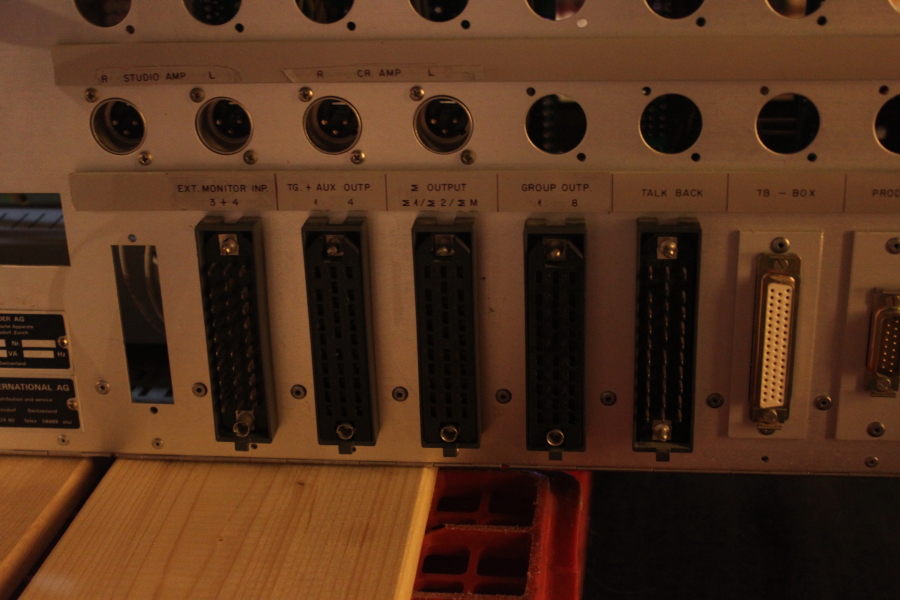
Here are some shots of the back of the console. This is where all of the connections are made. Obviously, some of the labels had come off so somebody decided to write in permanent marker on the panel. If you haven't already noticed, I don't like my things to look imperfect. This was unacceptable.
I grabbed my handy dandy 99% isopropyl alcohol and got to work...
Not bad eh? I was very pleased with how nicely it turned out. If you're wondering... yes, I was sure to get pictures of all of the connections so that I would know how to re-label them. That will come later.
Remember that mess of wires in the back?
This may be the nerdiest thing I have ever written but... BRAND NEW CABLE DUCTS, BABY! I went to my local electronics shop and bought new cable ducts with covers. I cut them to length and drilled holes in them. I drilled out the rivets that held the old, dusty, coverless cable ducts and carefully pulled them out (this wasn't easy as the wiring didn't allow much room). I then used my new hand-held pop-riveter to install the new ducts. It's now much more organized. It isn't perfect, but I promised myself that I wouldn't get into rewiring the console unless it wasn't functional.
Some of the things that I did in this time which aren't represented by pictures:
- Cleaned the ENTIRE frame from head to toe. I actually ended up taking a few days to go through every inch of the frame to make sure that there was no dirt or dust. I did like the musty smell that the console used to have but I won't stand for it to be anything less than immaculate.
- Cleaned the legs and outer panels that I removed. Most of it just needed a few wipe-downs with some warm, soapy water.
- Reassembled everything that I took apart in this blog. You will have to wait to see the result in future posts! Sorry!
- Cleaned the armrest with leather cleaner.
Well, actually, I have a before picture here:
I really debated with myself on whether to replace the leather on these. They look pretty rough, don't they? After cleaning them, I was moderately pleased with how they looked. They were still worn, but they were clean and not gross-looking like the above. I actually decided NOT to replace the leather. The reason why I decided this was because I started to notice that the console was losing a bit of character. There's something to be said for some old-time charm in an instrument such as a console. Instead of replacing the armrest leather with something clean and new looking, I decided to let it keep some personality. This decision wasn't easy (as I'm a bit of a perfectionist) but it was the right choice in my opinion.
The steps in this blog post took a couple of weeks to complete as I was quite careful not to miss anything. I wasn't about to take the console apart like this again any time soon.
It doesn't really feel fair that I had to put so much work into something that will take you only 5 minutes to read, haha. We're going to move on to the meterbridge modules on Thursday! I promise that you will get to see the console frame put back together and the meterbridge finished! Have a great week!


Hi, I am the owner of one mixing desk witch is exactly the same as yours (www.studiodulac.fr). I would be interested ;-) in other informations about recapping the whole thing and especially have your thinking about tantalium capacitors replacement, are they still on the market or should I replace them with chemicals? (space problem)? Thank you for watching if you read me. Pierre.
ReplyDelete